Origami skull: how to make paper, scheme and master class
What can you do with your kids for Halloween? It all depends on how impressionable the child is. Usually, images of evil witches, bloodthirsty vampires or terrible ghosts are used for copying and decoration. But until you pick up something suitable, you will have to reconsider a lot of awesome options. Another thing, the image of the skull. This paper craft is quite suitable for the theme of the day of evil spirits, but no one will be afraid of it. On the contrary, it is useful for children to know how the human body works, what the skull looks like.
This master class shows in detail how to make an origami skull with your own hands. It is desirable to make it white to show the maximum resemblance to a part of the human body.
To make an origami skull, prepare:
- a square sheet of white paper - the usual office version or square blanks for notes;
- some black paper;
- scissors and glue.
How to model an origami skull with your own hands?
You can consider the origami skull as a simple model that will introduce young creators to the technique of paper folding. Prepare a square of white paper to create the intended craft, the side length can be 12 cm, or choose your more suitable parameters. If you are helping a preschool child, then you need to prepare 2 identical sheets. An adult must perform the craft step by step, showing an example to the child and explaining each step.

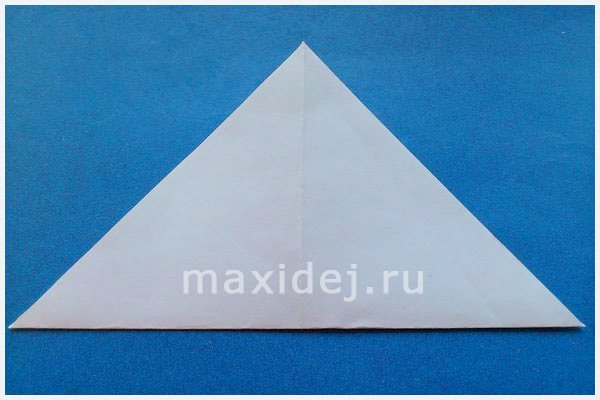
First, bend the square along one diagonal, with the pad of your finger with pressure, draw along the fold. Then straighten the square and make a similar bend, but along the second diagonal. Thus, at this stage, 2 lines along the diagonals will be selected.
After returning the square to its original position, bend the two adjacent sides, combining them without gaps along one diagonal.
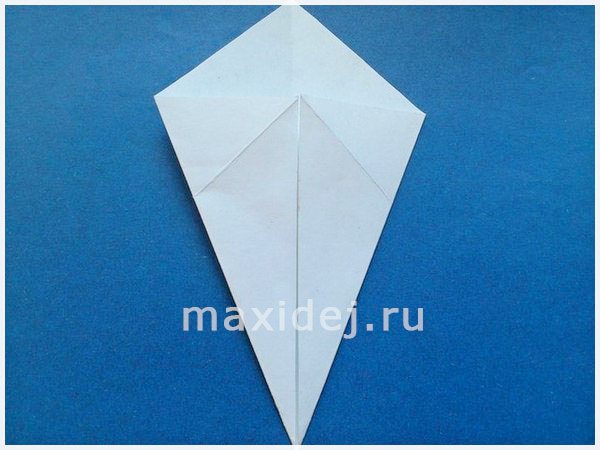
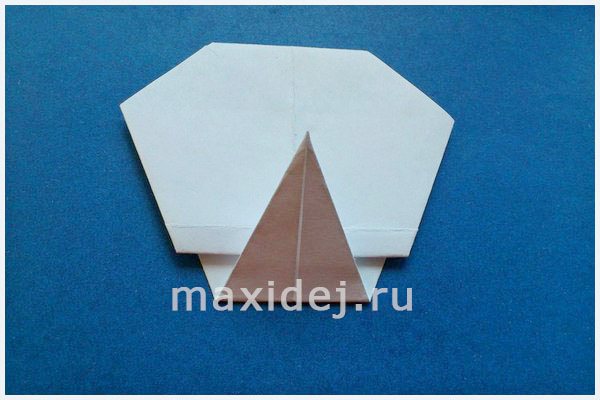
Lower the upper corner in the resulting pointed part down, joining 3 corners at one point.
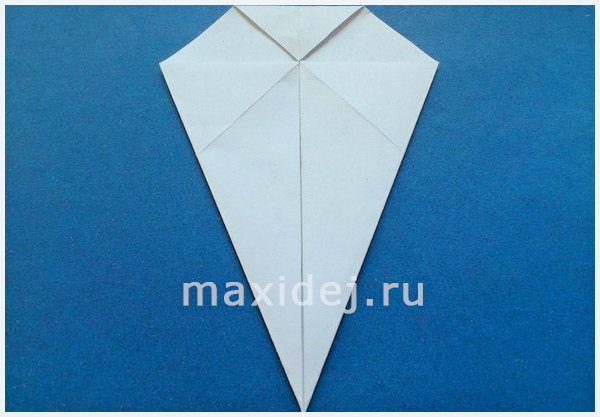
Lift the pointed nose up approximately in the center, performing a horizontal bend. Then lower this protrusion down again, but do not unfold the paper completely, but leave a small fold (about 0.5 cm).
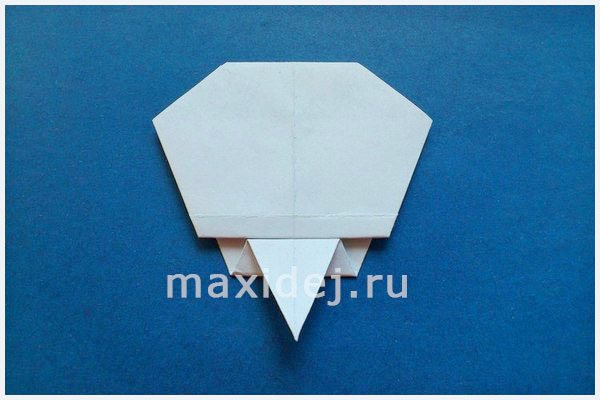
Turn the part with the blank side towards you. Here you will again see a ledge descending down. Lift it up, leaving a gap of about 0.5 cm.
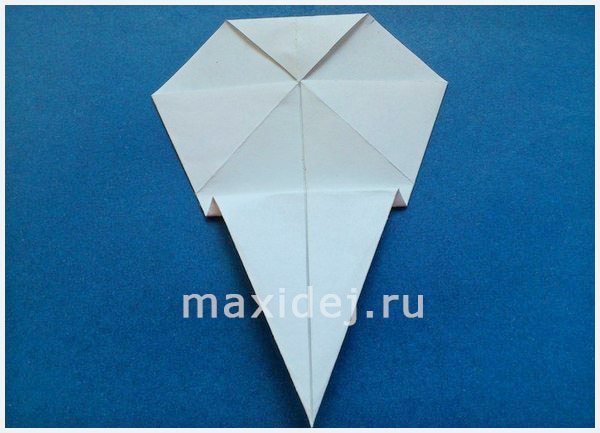
Lower the protrusion down, docking with the horizontal line that separates the rounded model.
Lift the tip up again, drawing a zigzag line.
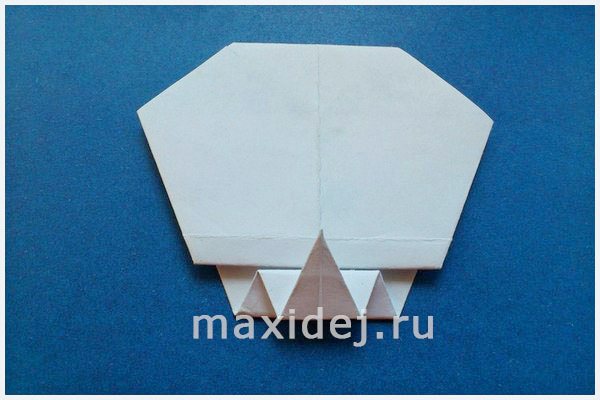
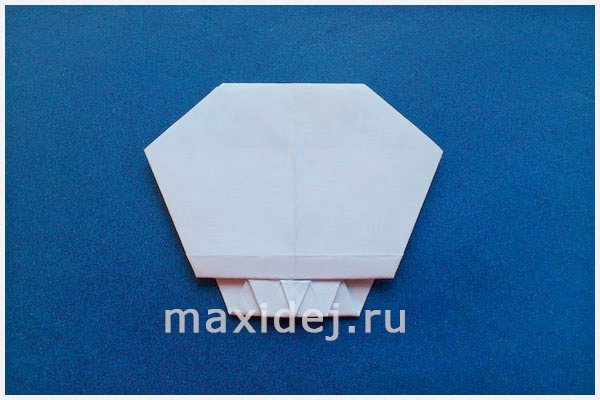
Return the rest of the ledge down. If you keep the proportions, then you will get the perfect zigzag line, there will be no extra ledge. The last triangular fold can be smeared with glue and pressed down so that the model holds well.
And not far off and the New Year holidays, keep a link to an excellent
The origami model itself, very similar to a skull, is already ready. But we also prepared black paper. It will be needed for additional elements. Cut out black circles for the eyes and nose. Glue them to the main oval part. Thus, we will show hollows instead of eyes and nose.

The origami skull is ready. This is the perfect Halloween craft. It guards the treasure and may belong to some brave pirate traveler.
See also the video: how to make an origami talking skull: